RV Tire Pressure and Replacement: A Buyer’s Guide
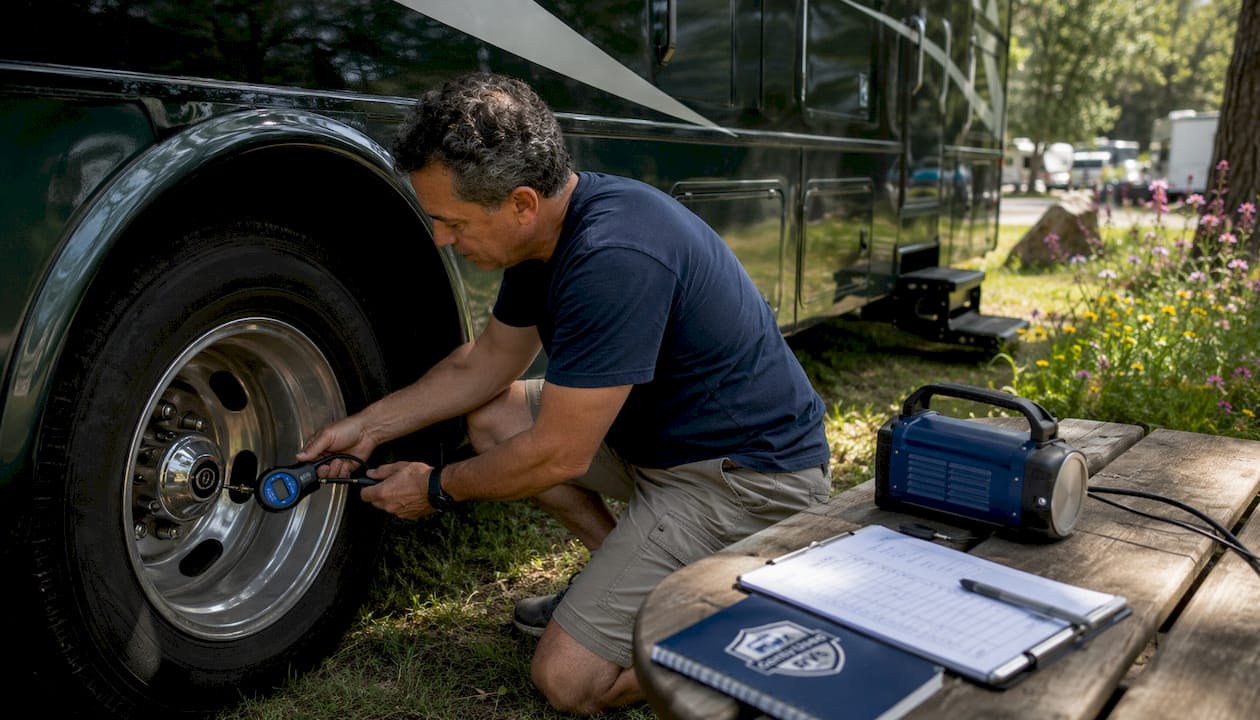
Set your RV tires to the cold PSI shown on the vehicle certification label, or weigh each axle end and use your tire manufacturer’s load-inflation table to find the exact required pressure. That’s the short answer. For used-RV buyers and dealers, the longer answer also includes knowing when tires are too old, too damaged, or too compromised to trust, regardless of how much tread is left.
Here’s what to act on immediately before any purchase, sale, or road trip:
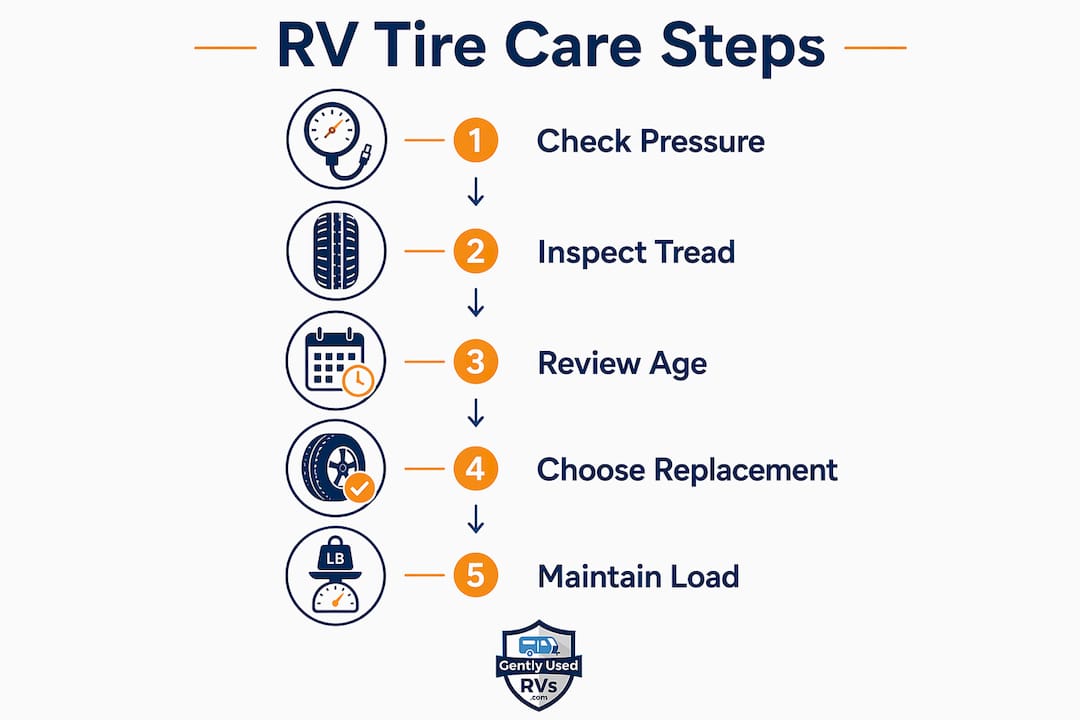
- Check cold PSI against the vehicle placard or load-inflation table, not the sidewall maximum.
- Read the DOT date code on every tire. Four digits at the end of the DOT string give you week and year of manufacture (“2622” = week 26 of 2022).
- Inspect sidewalls for cracking, bulges, or bubbles. Any of those is a replacement trigger, full stop.
- Tread at or below 2/32" means the tire is legally worn out. Replace before listing or buying.
Pro Tip: Tire pressure changes about 1 PSI for every 10°F shift in ambient temperature. Always check pressure in the morning before driving, not after the rig has been sitting in afternoon sun.
Table of Contents
- How to find the correct cold PSI for your RV
- When do used RV tires actually need to be replaced?
- Your pre-purchase and pre-trip tire inspection checklist
- How to choose the right replacement tires for a used RV
- How to weigh your motorhome and set pressure from load-inflation tables
- Storage practices that protect tires on parked and dealer-inventory RVs
- Key Takeaways
- Why tire condition is central to every listing on Gently Used RVs
- Useful sources
How to find the correct cold PSI for your RV
The sidewall maximum is not your target pressure. That number tells you the highest pressure the tire can safely hold at its maximum rated load. It’s a ceiling, not a recommendation. Running every tire at sidewall max regardless of actual load causes accelerated center-tread wear and a smaller contact patch than the tire is designed to provide.
Three authoritative sources tell you the right number:
- Vehicle certification label (placard): On motorhomes, it’s usually near the driver’s door. On trailers, check the tongue or driver’s-side front wall. This pressure assumes the RV is loaded to its maximum rated weight (GVWR). If your rig is lighter, you may be overinflated; if you’ve added gear beyond what the manufacturer anticipated, you could be underinflated without realizing it.
- Owner’s manual: Confirms placard values and may include load-specific adjustments.
- Manufacturer load-inflation tables: Michelin and Goodyear both publish these online. They map a specific weight per tire to a specific PSI for that exact tire size. This is the gold standard for heavy motorhomes and any rig where you’ve modified the load.
The only correct tire pressure for your RV is the one that matches your actual load. Using the sidewall max as your operating pressure is one of the most common errors in RV tire maintenance, and it leads to both over- and underinflation risks depending on how your rig is loaded.
Pro Tip: For trailers running ST tires rated 85 PSI or less, inflate to the sidewall maximum. For ST tires rated above 85 PSI, use the load-inflation table method and add a 25% safety margin above the minimum PSI for your measured weight.
When do used RV tires actually need to be replaced?
Age often matters more than tread depth for RVs that spend months parked between trips. A tire that looks fine on the outside can have internal structural degradation that only shows up as a blowout at highway speed.
Age thresholds: Tires 6–10 years old are commonly recommended for replacement regardless of remaining tread. After 5–7 years, annual professional inspection is the minimum. If a tire shows only three digits in its DOT code, it was made before 2000. Replace it immediately.
Visible damage that requires immediate replacement:
- Sidewall cracking deeper than surface crazing
- Any bulge, bubble, or blister on the sidewall or tread
- Exposed cords or plies
- Repeated air loss without an obvious puncture (suggests internal damage)
A bulge in the sidewall is structural failure in progress. It means the internal cords have already separated. No amount of inflation fixes it, and driving on it is a blowout waiting to happen.
Tread depth: The legal minimum is 2/32" for most vehicles. For heavy front-axle motorhomes, many technicians recommend replacing at 4/32" because steering response degrades before the legal limit. Uneven wear across the tread face also signals alignment or inflation problems that need diagnosis before new tires go on.
Call a professional when you suspect belt separation, when a blowout has occurred (even if the tire holds air afterward), or when rim damage is visible. Internal damage is invisible to a casual inspection.
Your pre-purchase and pre-trip tire inspection checklist
Use this checklist on-site at a dealer lot, private seller’s driveway, or RV park. Do it before any money changes hands.
- Time your check correctly. Tires must be cold: stationary for at least 3 hours or driven less than 1 mile.
- Gather your tools. You need a quality digital gauge (not a gas station gauge), a dual-angled head gauge for dual wheels, a portable air compressor, and a flashlight for sidewall inspection.
- Check all tire pressures, including the spare. Compare each reading to the placard value or your load-inflation table target.
- Inspect every valve cap. Missing or cracked caps let moisture into the valve core and cause slow leaks.
- Walk every sidewall. Look for cracking, bulges, bubbles, and any object embedded in the tread.
- Check tread depth with a tread depth gauge or the quarter test. Replace at or below 2/32".
- Read every DOT date code. Photograph each one for your records.
- Verify TPMS sensors are reading correctly if the rig is equipped. A TPMS catches slow leaks during travel but does not replace a cold manual check before departure.
- Document everything. Record PSI readings, DOT codes, and tread depth measurements. Photo the placard and each tire’s sidewall.
Pro Tip: For dual-wheel axles, inner and outer tires should be within 5 PSI of each other. A dual-angled head gauge lets you check both quickly without removing the inner valve cap.
Tools to have on hand:
- Digital tire pressure gauge
- Dual-angled head gauge (for duals)
- Tread depth gauge
- Portable 12V compressor
- TPMS scan tool or display (if rig is equipped)
How to choose the right replacement tires for a used RV
Matching the replacement tire correctly is not optional. A mismatch in size, load range, or construction type creates handling problems and can void any remaining warranty.

Size and construction: The tire size code on the sidewall (for example, ST235/80R16) must match exactly across an axle. Never mix radial and bias-ply tires on the same axle. Never mix ST and LT tires on the same trailer.
Load range and ply rating: Pick a tire whose load capacity at your target cold PSI meets or exceeds the heaviest axle-end weight you recorded. A tire with a higher load range than you need is fine. A tire that can’t carry the actual load is a liability.
Never exceed the maximum air pressure stamped on your wheels or rims, even if the tire sidewall allows a higher PSI. The rim limit is the hard ceiling, and exceeding it risks structural rim failure.
Buying checklist for dealers and buyers:
- Replace tires in pairs on the same axle, or replace the full axle set.
- Confirm the new tire’s load capacity against your recorded axle-end weights.
- Check the rim’s stamped maximum pressure before inflating.
- Keep purchase receipts and warranty documents with the rig’s records.
- Documented inspections and maintenance records support warranty claims and road-hazard protection.
Pro Tip: When replacing tires on a used RV you’re preparing to list, note the new tires’ DOT codes and purchase date in the listing. Buyers treat fresh tires as a genuine value signal, and it reduces negotiation friction.
How to weigh your motorhome and set pressure from load-inflation tables
For Class A, B, and C motorhomes, and any heavy commercial-chassis RV, the placard is a starting point, not the final answer. Weighing each axle end separately gives you the data to set pressure precisely.
- Find a certified scale. CAT Scales at truck stops are widely available and acceptable for this purpose. Request an axle-end printout that shows the weight at each side of each axle, not just total axle weight.
- Load the rig as you travel. Weigh with your typical gear, water, and passengers aboard. An empty rig gives you useless numbers.
- Pull your tire’s load-inflation table. Search the manufacturer’s website for “load and inflation tables” plus your tire size. Michelin, Goodyear, and other major manufacturers publish these online.
- Match axle-end weight to PSI. Find the weight row that meets or exceeds your heaviest axle-end reading. Always round up to the next bracket.
- Set all tires on that axle to the same pressure, using the value from the heavier side.
| Axle end weight | Load per tire (single) | Minimum cold PSI |
|---|---|---|
| — | — | Per table |
| — | — | Per table |
| — | — | Per table |
Populate with your tire manufacturer’s published values for your specific tire size.
Pro Tip: Keep the printed scale ticket with the rig’s documentation. Dealers who include axle-weight printouts in their listings give buyers immediate confidence and reduce back-and-forth during negotiations.
Storage practices that protect tires on parked and dealer-inventory RVs
UV exposure, ozone, and moisture degrade rubber faster than miles do for RVs that sit between seasons. Using tire covers and leveling blocks is considered a mandatory practice for responsible long-term storage, not an optional extra.
- Cover every tire with UV-blocking tire covers whenever the rig is parked for more than a few days.
- Avoid parking on dirt or grass. Moisture and organic material accelerate sidewall cracking. Park on concrete or asphalt, or use plywood squares under each tire.
- Use leveling blocks to distribute weight evenly and prevent flat-spotting on tires that sit under load for months. The step-by-step leveling guide from Gently Used RVs covers block placement in detail.
- Move the rig periodically. Even rolling it forward a few feet every few weeks prevents flat spots and redistributes the load contact point.
- Store spare tires indoors if possible, away from direct sunlight and ozone sources like electric motors. Keep them inflated to the tire’s recommended storage pressure.
- Check inflation before and after storage. Pressure drops during cold months; a tire that was correct in October may be dangerously low by March.
Pro Tip: Before putting a rig into long-term storage, photograph the DOT codes and record the current PSI on each tire. When the rig comes back out, you have a baseline to compare against and documentation ready for any buyer who asks. For broader seasonal prep, the RV winterization guide from Gently Used RVs covers tire storage alongside every other system.
Key Takeaways
Correct RV tire pressure starts with actual axle weights, not the sidewall maximum, and replacement decisions hinge on age and visible damage as much as tread depth.
| Point | Details |
|---|---|
| Use placard or load-inflation table | Never use sidewall max PSI as your operating pressure; match PSI to actual load. |
| Check cold, check often | Verify pressure weekly during use, before every trip, and before and after storage. |
| Age triggers replacement | Tires 6–10 years old should be replaced regardless of tread; read the DOT code. |
| Document for every transaction | Record cold PSI, DOT codes, and axle weights; include photos in listings. |
| Get professional help for hidden damage | Suspected belt separation, blowout history, or rim damage requires expert inspection. |
Why tire condition is central to every listing on Gently Used RVs
At Gently Used RVs, we see the same pattern repeatedly: listings with clear tire documentation, including DOT code photos, recorded cold PSI values, and axle-weight printouts, move faster and generate fewer disputes than listings that skip it. Buyers are right to be cautious about tires on a used rig. Tires are the single component most likely to cause a catastrophic failure on the road, and they’re also the component most likely to have been neglected during storage.
Our recommendation to every seller is simple: photograph each tire’s DOT code, record the cold PSI at the time of listing, and note the date of your last professional inspection. If the tires are new, include the purchase receipt. That transparency signals a well-maintained rig and gives buyers the confidence to move forward without demanding a price cut to cover unknown tire risk.
For dealers managing inventory, the dealer listing tools at Gently Used RVs make it straightforward to include this documentation at scale. And for buyers who want to verify what they’re looking at, our dealer directory connects you with professional inspection services across the United States.

Useful sources
- Michelin Load and Inflation Tables for RVs — authoritative PSI-per-load data for LT and commercial RV tires
- Goodyear/Heartland RV Tire and Care Guide — storage, dual-wheel inflation, and gauge technique guidance
- Winnebago RV Tire Care, Maintenance & Replacement Guide — cold-check frequency, temperature effects, and DOT age thresholds
- CAT Scales / Wonderland Tire: RV Tire Pressure 101 — practical weighing guidance and scale locations
- Family RV Living: TPMS and Blowout Prevention — TPMS role in ongoing monitoring
- Gently Used RVs Dealer Directory — professional inspection and replacement services across the United States